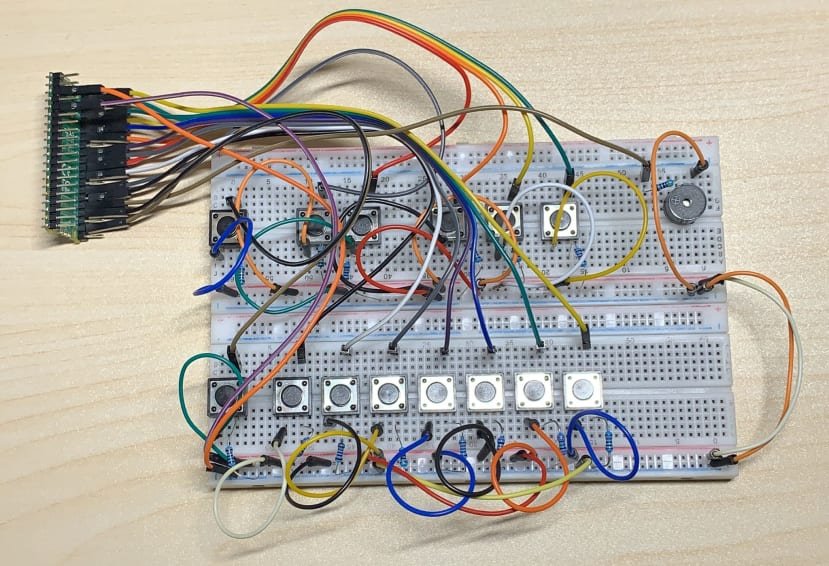
Welcome to the world of music and Raspberry Pi! In this beginner-friendly tutorial, we’ll embark on a musical journey by creating a Pi Piano—a simple project that introduces you to the world of sound with the help of a Raspberry Pi and a buzzer. Whether you’re a music enthusiast or a coding beginner, this project is designed to make learning both fun and melodious. Let’s dive in and create our very own Pi Piano!
Materials Needed:
- Raspberry Pi (any model with GPIO pins)
- MicroSD card with Raspbian OS installed
- Buzzer (Passive or Active)
- Jumper wires
- Breadboard
Step 1: Set Up Your Raspberry Pi
If you haven’t set up your Raspberry Pi yet, follow these steps:
- Download the latest Raspbian OS from the official Raspberry Pi website.
- Use a tool like Etcher to flash the OS onto your microSD card.
- Insert the microSD card into your Raspberry Pi, connect peripherals, and power it up.
Step 2: Connect the Buzzer to Raspberry Pi
- Identify the pins on your buzzer. Typically, there will be a positive (longer leg) and negative (shorter leg) pin.
- Connect the positive pin of the buzzer to GPIO pin 18 on the Raspberry Pi.
- Connect the negative pin of the buzzer to any ground (GND) pin on the Raspberry Pi.
Step 3: Enable GPIO for Sound
Open the terminal on your Raspberry Pi and enter the following command to enable the GPIO for sound output:
sudo nano /etc/modprobe.d/raspi-blacklist.confComment out the line blacklist snd_bcm2835 by adding a # at the beginning of the line.
Step 4: Install Required Software
In the terminal, install the required software for sound output:
sudo apt-get update
sudo apt-get install python3-pip
sudo pip3 install RPi.GPIO
sudo apt-get install python3-pygame
Step 5: Write the Pi Piano Script
Create a new Python script. For example, open the Python IDE and enter the following script:
import RPi.GPIO as GPIO
import pygame
import time

# Set up GPIO
GPIO.setmode(GPIO.BCM)
GPIO.setup(18, GPIO.IN, pull_up_down=GPIO.PUD_UP)

# Initialize pygame
pygame.mixer.init()

# Define notes
notes = {
    'C': 261,
    'D': 294,
    'E': 329,
    'F': 349,
    'G': 392,
    'A': 440,
    'B': 493
}

# Play a note
def play_note(note):
    pygame.mixer.Sound.stop()
    sound = pygame.mixer.Sound(pygame.mixer.Sound("/usr/share/sounds/alsa/Front_Center.wav"))
    sound.set_volume(0.5)
    sound.play(frequency=notes[note])

# Main loop
try:
    while True:
        # Read input from the buzzer
        input_state = GPIO.input(18)

        # If the buzzer is pressed, play a note
        if input_state == False:
            print('Buzzer Pressed')
            play_note('C')
            time.sleep(0.5)

except KeyboardInterrupt:
    # Clean up when the script is interrupted
    GPIO.cleanup()
Save the script with an appropriate name, for example, pi_piano.py.
Step 6: Run Your Pi Piano
In the terminal, navigate to the directory where you saved your Python script and run it using the following command:
python3 pi_piano.pyNow, press the buzzer, and you should hear the corresponding note!
Conclusion:
Congratulations! You’ve successfully created a Pi Piano—a simple yet delightful project that combines the joy of music with the power of Raspberry Pi. This project not only introduces you to basic sound output but also lays the foundation for more complex musical endeavors.
Feel free to experiment by adding more notes, creating melodies, or even connecting multiple buzzers. The possibilities are endless as you explore the harmony between technology and music.
Stay tuned for more exciting Raspberry Pi projects and tutorials as you continue your journey into the captivating world of DIY electronics. Happy coding and playing!


