In this Arduino project, we dive into the heart of programming with the MEGA 2560 R3 controller board. In this tutorial, you will master the art of making the Arduino’s built-in LED blink, and we’ll guide you through the basic steps of downloading programs onto your board. Let’s illuminate the world of electronics together!
Components Required:
- 1 x Elegoo Mega 2560 R3
Overview:
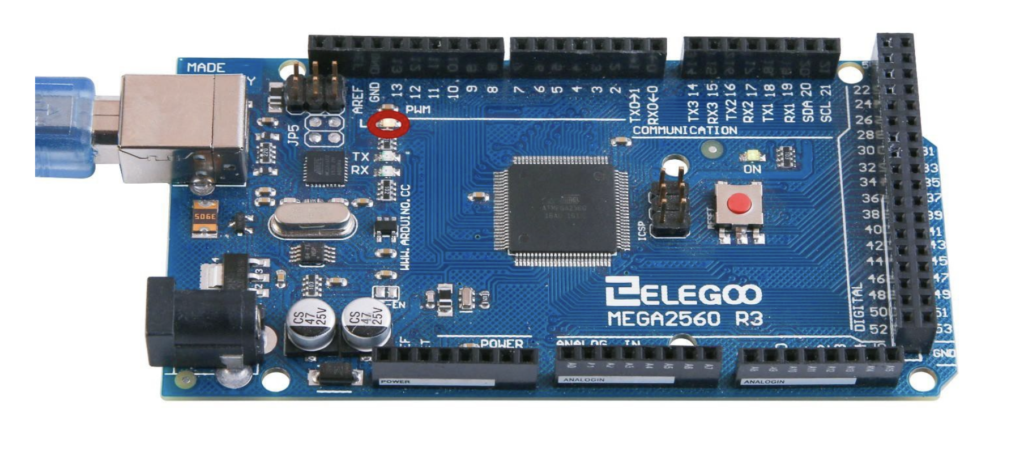
The MEGA 2560 R3 board is a powerhouse of connectors and capabilities. In this lesson, we focus on its built-in LED, often referred to as the ‘L’ LED. We’ll reprogram the board with our Blink sketch, providing you with the skills to control the LED and customize its blinking rate.
Principle:
The ‘L’ LED on the MEGA 2560 R3 board is a controllable indicator, and you might notice it blinking when connected to a USB plug. This is because it’s often shipped with the pre-installed ‘Blink’ sketch. In this lesson, we’ll overwrite it with our own version and adjust the blinking pace.


Let’s Get Started:
Step 1: Arduino IDE Setup
In Lesson 0, you set up your Arduino IDE and ensured the correct serial port connection to your MEGA 2560 R3 board. Now, it’s time to test that connection and program your board.
Step 2: Load the Blink Sketch
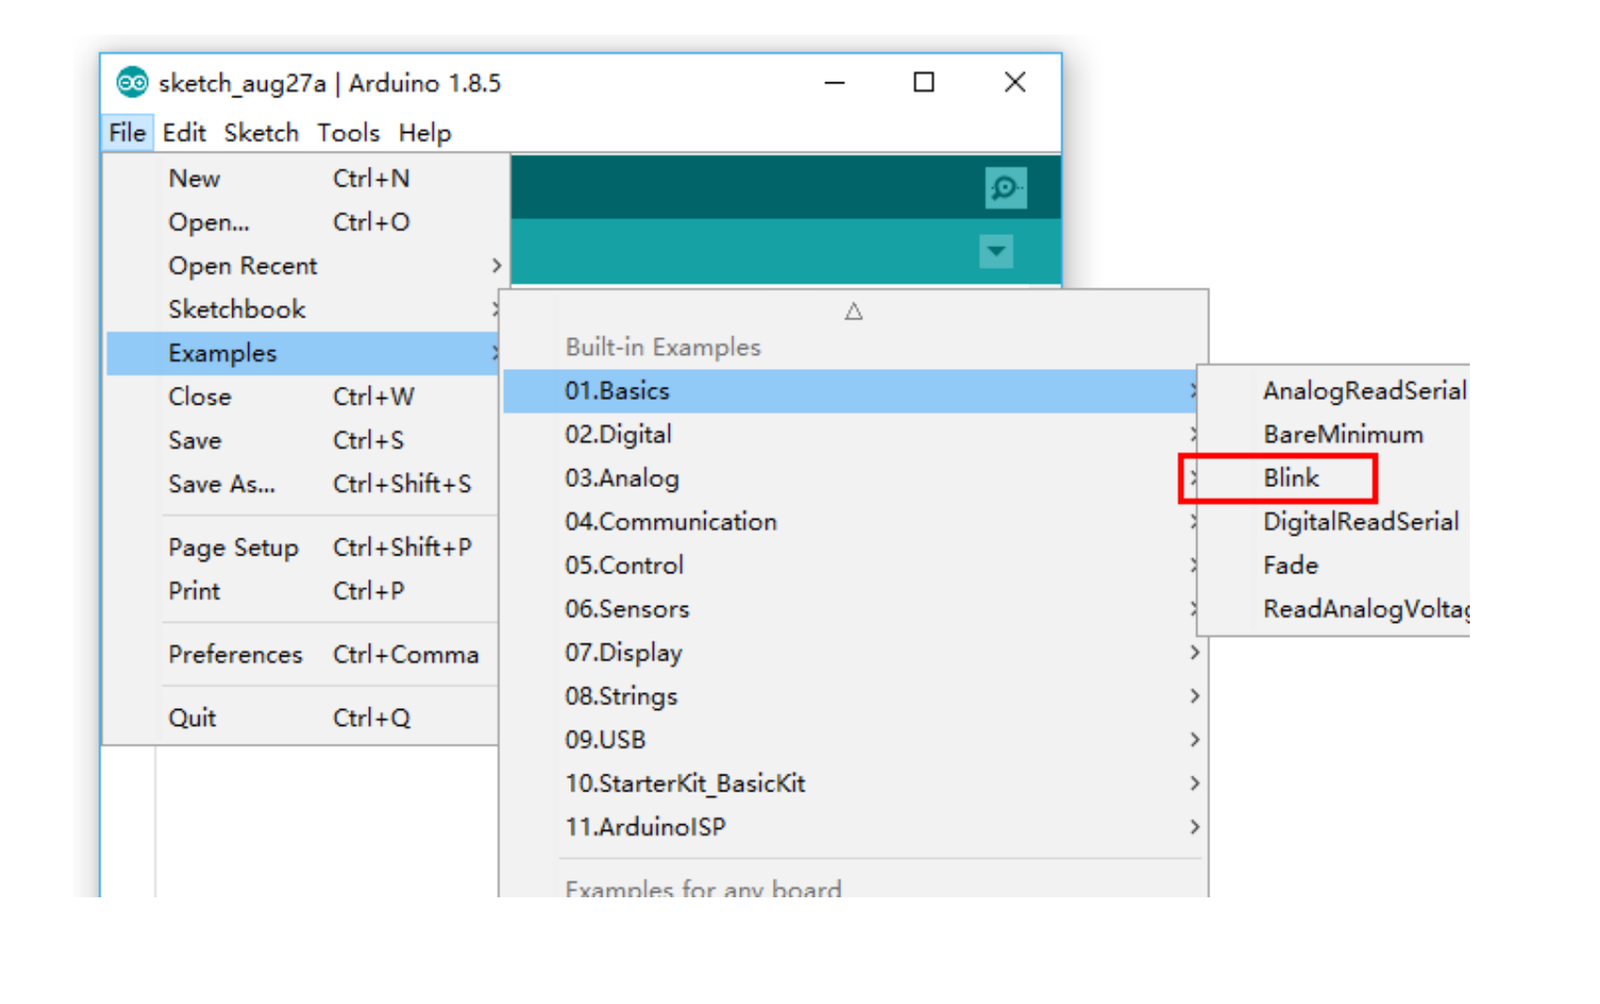
- Open the Arduino IDE and navigate to File > Examples > 01. Basics.
- Select the ‘Blink’ sketch. This sketch makes the ‘L’ LED blink and is an excellent starting point.
Step 3: Save Your Version
Since we’re modifying this sketch, save your copy by going to File > Save as… and name it ‘My Blink.’ This ensures you have your personalized version in the sketchbook.
Step 4: Connect and Upload
- Attach your Arduino board to your computer using the USB cable.
- Confirm that ‘Board Type’ and ‘Serial Port’ are correctly set in the Arduino IDE.
- Click on the ‘Upload’ button (second button from the left on the toolbar).
Step 5: Witness the Blinking Symphony
Watch the progress bar and messages in the IDE. Upon completion, the board should restart, and you’ll observe the LED blinking.
Understanding the Code:
Open the ‘Blink’ sketch to explore its structure. A significant portion consists of comments, providing explanations. Key points include:
- The pin for the LED (usually 13 on MEGA 2560) is defined as int led = 13;.
- The setup function initializes the LED pin as an output.
- The loop function turns the LED on, waits for a second, turns it off, and repeats.
Customizing the Blink Rate:
To make the LED blink faster, alter the delay values in the loop function. For instance, change both delay(1000) to delay(500) for a quicker blink.
Upload the modified sketch to see the LED dancing at an accelerated pace.
Conclusion:
You’ve successfully programmed your MEGA 2560 R3 board to control the LED’s blinking behavior. This fundamental lesson lays the groundwork for more advanced projects. Experiment with different delay values and explore the diverse capabilities of your Arduino.
Stay tuned for more enlightening Arduino lessons as you continue your journey into the realm of electronic mastery. Happy coding! 💡🚀