Welcome to the world of Arduino, where your journey into the exciting realm of electronics begins! In this step-by-step guide, we’ll walk you through the process of setting up and programming an LED to blink using an Arduino board. Whether you’re new to programming or just starting with Arduino, this project is an excellent introduction to the basics of hardware and coding. Let’s dive in and bring light to your first Arduino project!
Materials Needed:
- Arduino board (e.g., Arduino Uno)
- USB cable for connecting Arduino to your computer
- LED (any color)
- 220-ohm resistor
- Breadboard and jumper wires
Step 1: Set Up Your Arduino Environment
- Download and Install the Arduino IDE:
- Visit the official Arduino website: Arduino Software
- Download the latest version of the Arduino IDE for your operating system.
- Follow the installation instructions provided on the website.
- Connect Arduino to Your Computer:
- Use the USB cable to connect your Arduino board to a USB port on your computer.
- Open Arduino IDE:
- Launch the Arduino IDE that you installed in step 1.
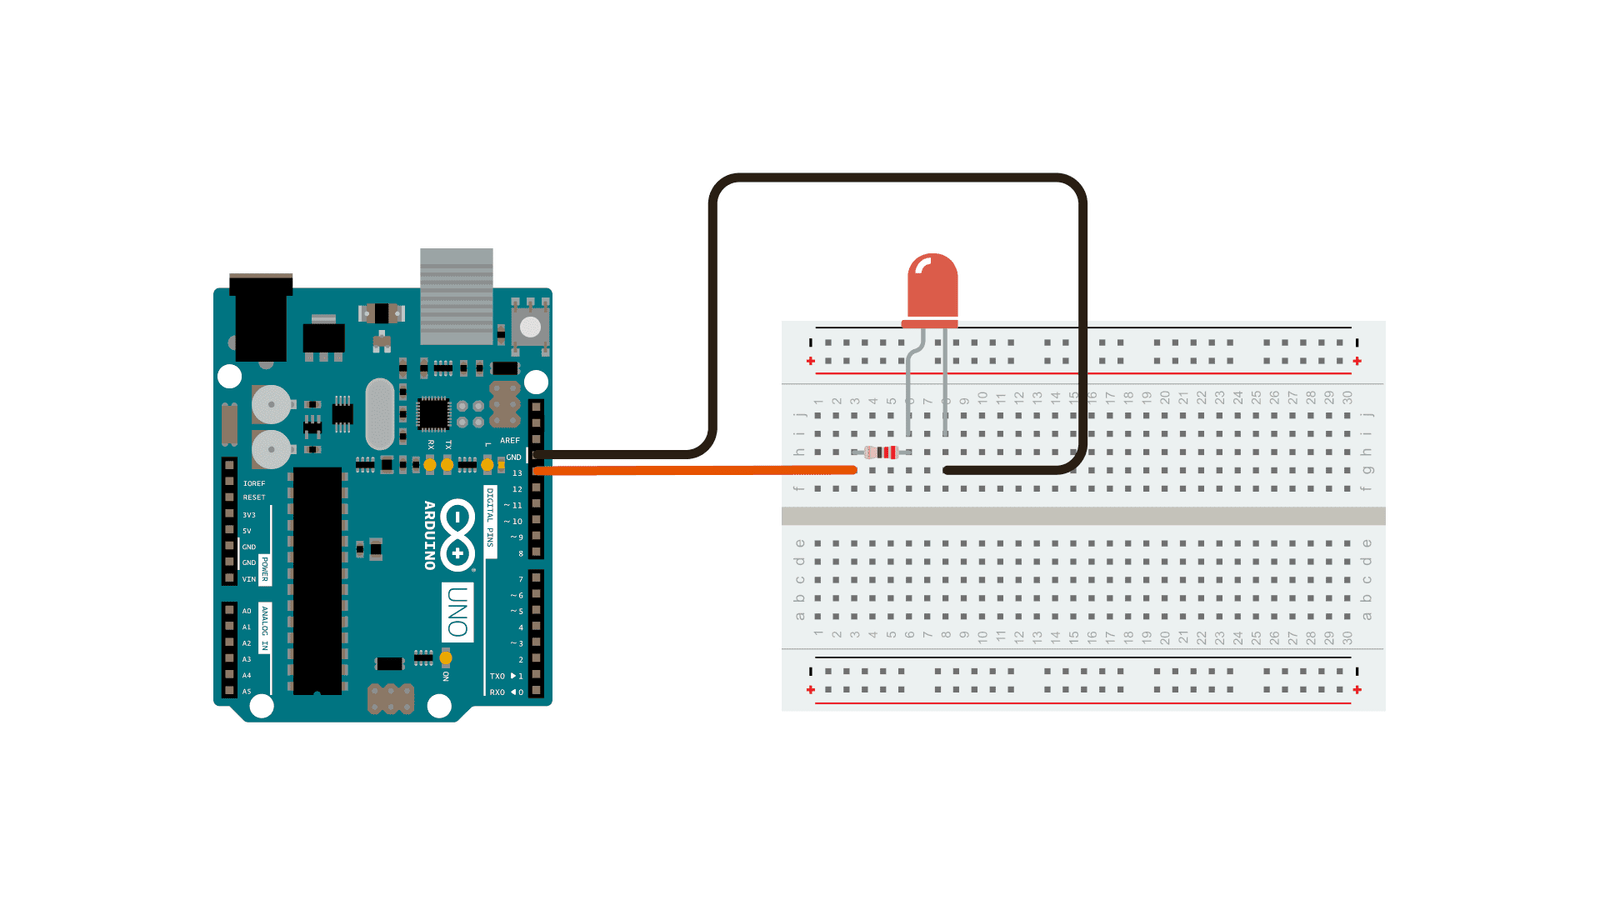
Step 2: Connect LED to Arduino
- Place the LED on the breadboard:
- Insert the longer leg of the LED (anode) into a hole in the breadboard.
- Connect the shorter leg of the LED (cathode) to the ground (GND) rail on the breadboard.
- Connect the resistor:
- Connect one leg of the resistor to the same row as the cathode of the LED.
- Connect the other leg of the resistor to a hole in the breadboard’s negative rail.
- Connect jumper wires:
- Connect a jumper wire from the anode of the LED to a digital pin on the Arduino (e.g., Pin 13).
- Connect another jumper wire from the cathode of the LED to a GND pin on the Arduino.
Step 3: Write Your Arduino Sketch (Code)
- In the Arduino IDE, click on “File” and select “New” to open a new sketch.
- Write the following code:
- Save your sketch by clicking on “File” and selecting “Save.” Give your sketch a name, for example, “BlinkingLED.”
// Define the LED pin
const int ledPin = 13;

// Setup function runs once when you press reset or power the board
void setup() {
  pinMode(ledPin, OUTPUT); // Initialize the digital pin as an output.
}

// Loop function runs repeatedly as long as the Arduino is powered on
void loop() {
  digitalWrite(ledPin, HIGH); // Turn on the LED
  delay(1000);                // Wait for 1 second
  digitalWrite(ledPin, LOW);  // Turn off the LED
  delay(1000);                // Wait for 1 second
}
Step 4: Upload Your Sketch to Arduino
- Connect your Arduino board to your computer if it’s not already connected.
- Select your Arduino board model and port:
- Go to “Tools” > “Board” and select your Arduino board model (e.g., Arduino Uno).
- Go to “Tools” > “Port” and select the port that your Arduino is connected to.
- Click on the right arrow button (Upload) in the Arduino IDE toolbar to compile and upload your sketch to the Arduino board.
- Wait for the upload process to finish. You should see a “Done uploading” message.
Step 5: Witness the Blinking LED
Congratulations! You’ve successfully set up and programmed your Arduino to make the LED blink. Observe the LED connected to Pin 13 on the Arduino board, and you’ll see it flashing on and off at a one-second interval.
Conclusion:
You’ve just completed your first Arduino project—creating a blinking LED! This project serves as a fundamental introduction to both the Arduino platform and the basics of programming. From here, you can explore more complex projects, sensors, and actuators as you continue your journey into the world of electronics and coding.
Stay tuned for more exciting Arduino projects and tutorials as you delve deeper into the possibilities of this versatile microcontroller. Happy tinkering!